Configure your iOS Mail-App

Email

1. Schritt: Einstellungen

1. Please open the app 'Settings' and select 'Mail, Contacs, Calendar':


2. Schritt: Account hinzufügen

2. Select 'New Account' at the bottom of the 'Account'-list.


3. Schritt: Andere

3. Please select 'Other' at the end of the list.


4. Schritt: Mail-Account hinzufügen

4. Select 'Add Mail Account'


5. Schritt: Name eingeben

5. Please enter your name, your complete email-address and your password:


6. Schritt: Zugangsdaten

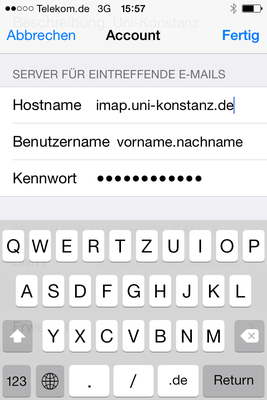
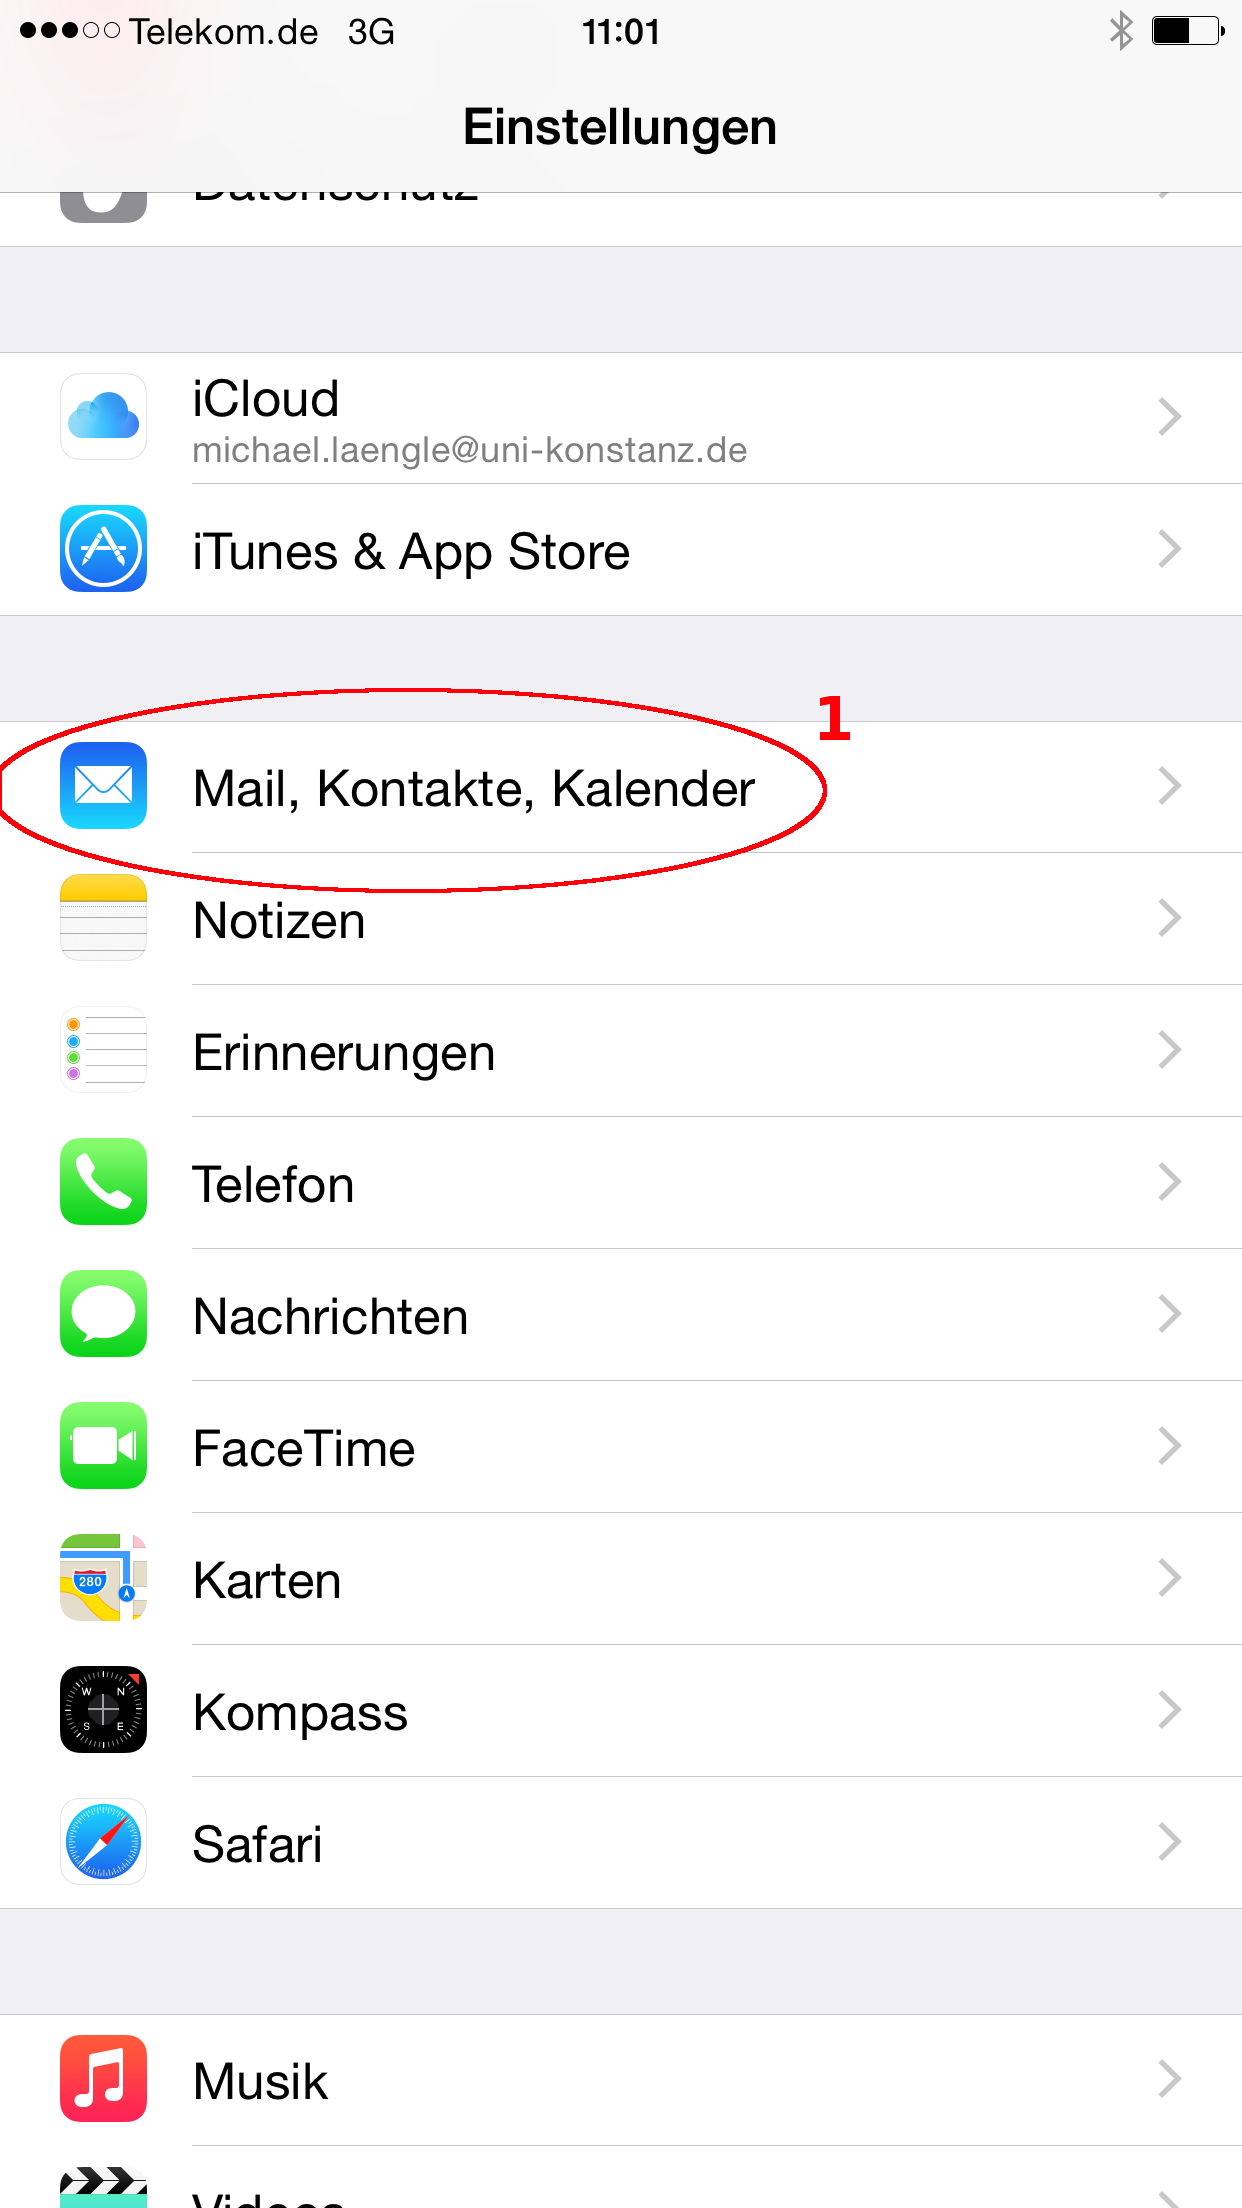
6. Now please enter the servername for IMAP (imap.uni-konstanz.de) and your account name (firstname.lastname).


7. Schritt: Zugangsdaten

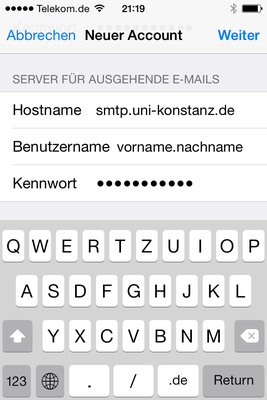
7. Finaly, please enter the hostname of the SMTP-server (smtp.uni-konstanz.de) and again your accountname (firstname.lastname) and your password.


8. Schritt: Fertig

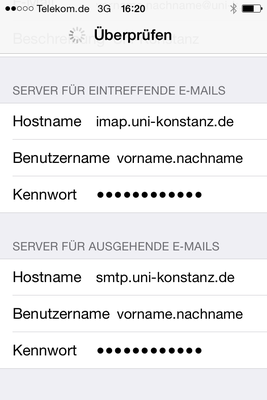
8. After checking your entries the configuration is finished. Encryption for sending and recieving mails will be setup automatically.


Calendar

Go to “Preferences” (1).


Select Email, Contacts, Calendar (1).


Select “Add account” (1).


Under “Account type”, please select “Other” (1).


Select “Add CalDAV account” (1).


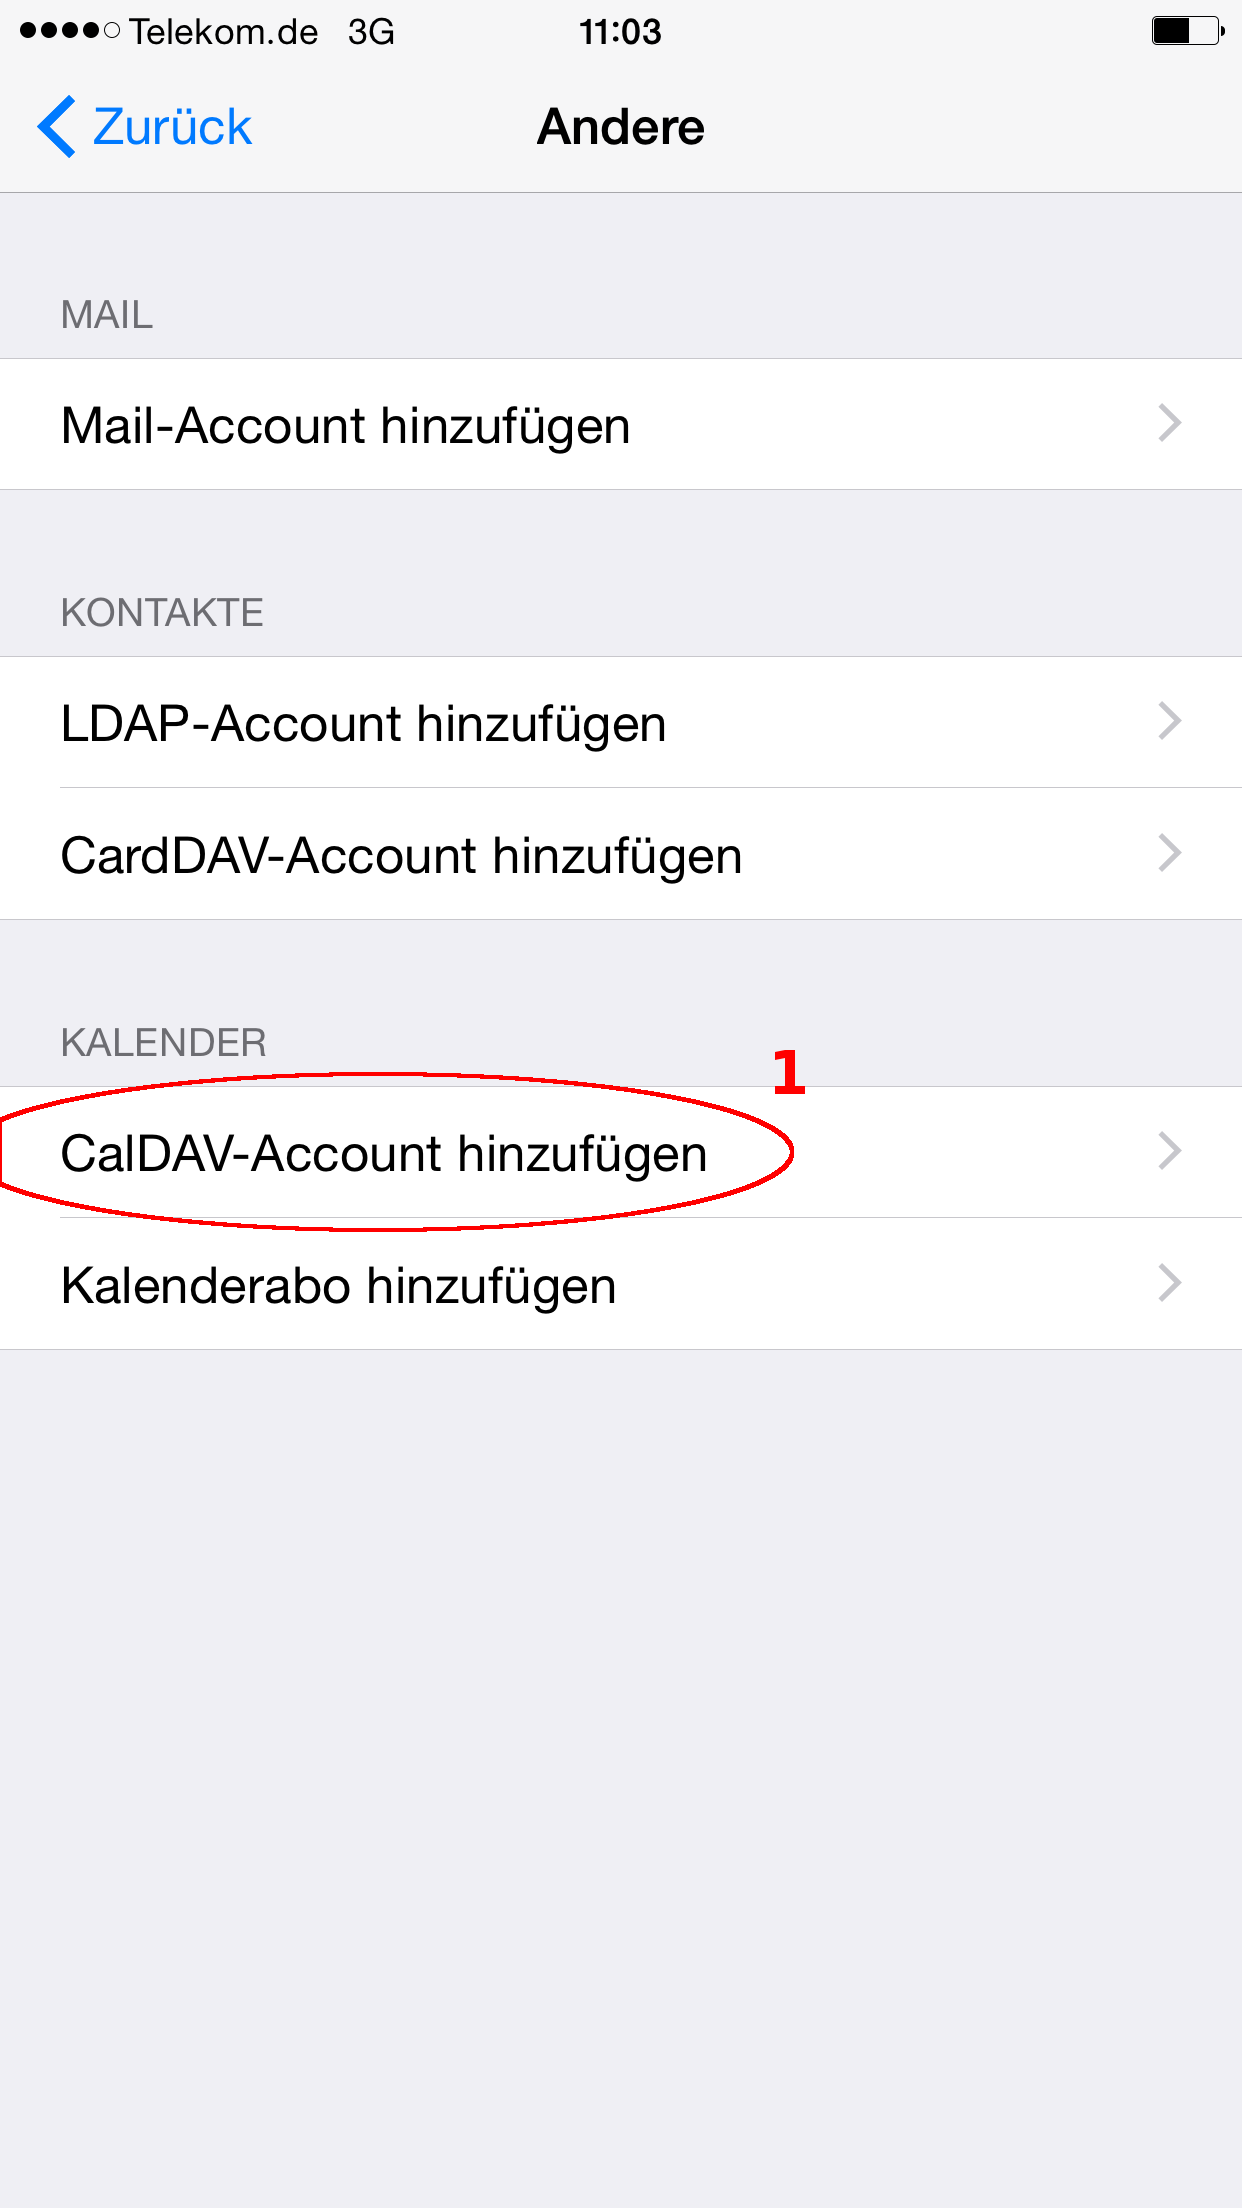
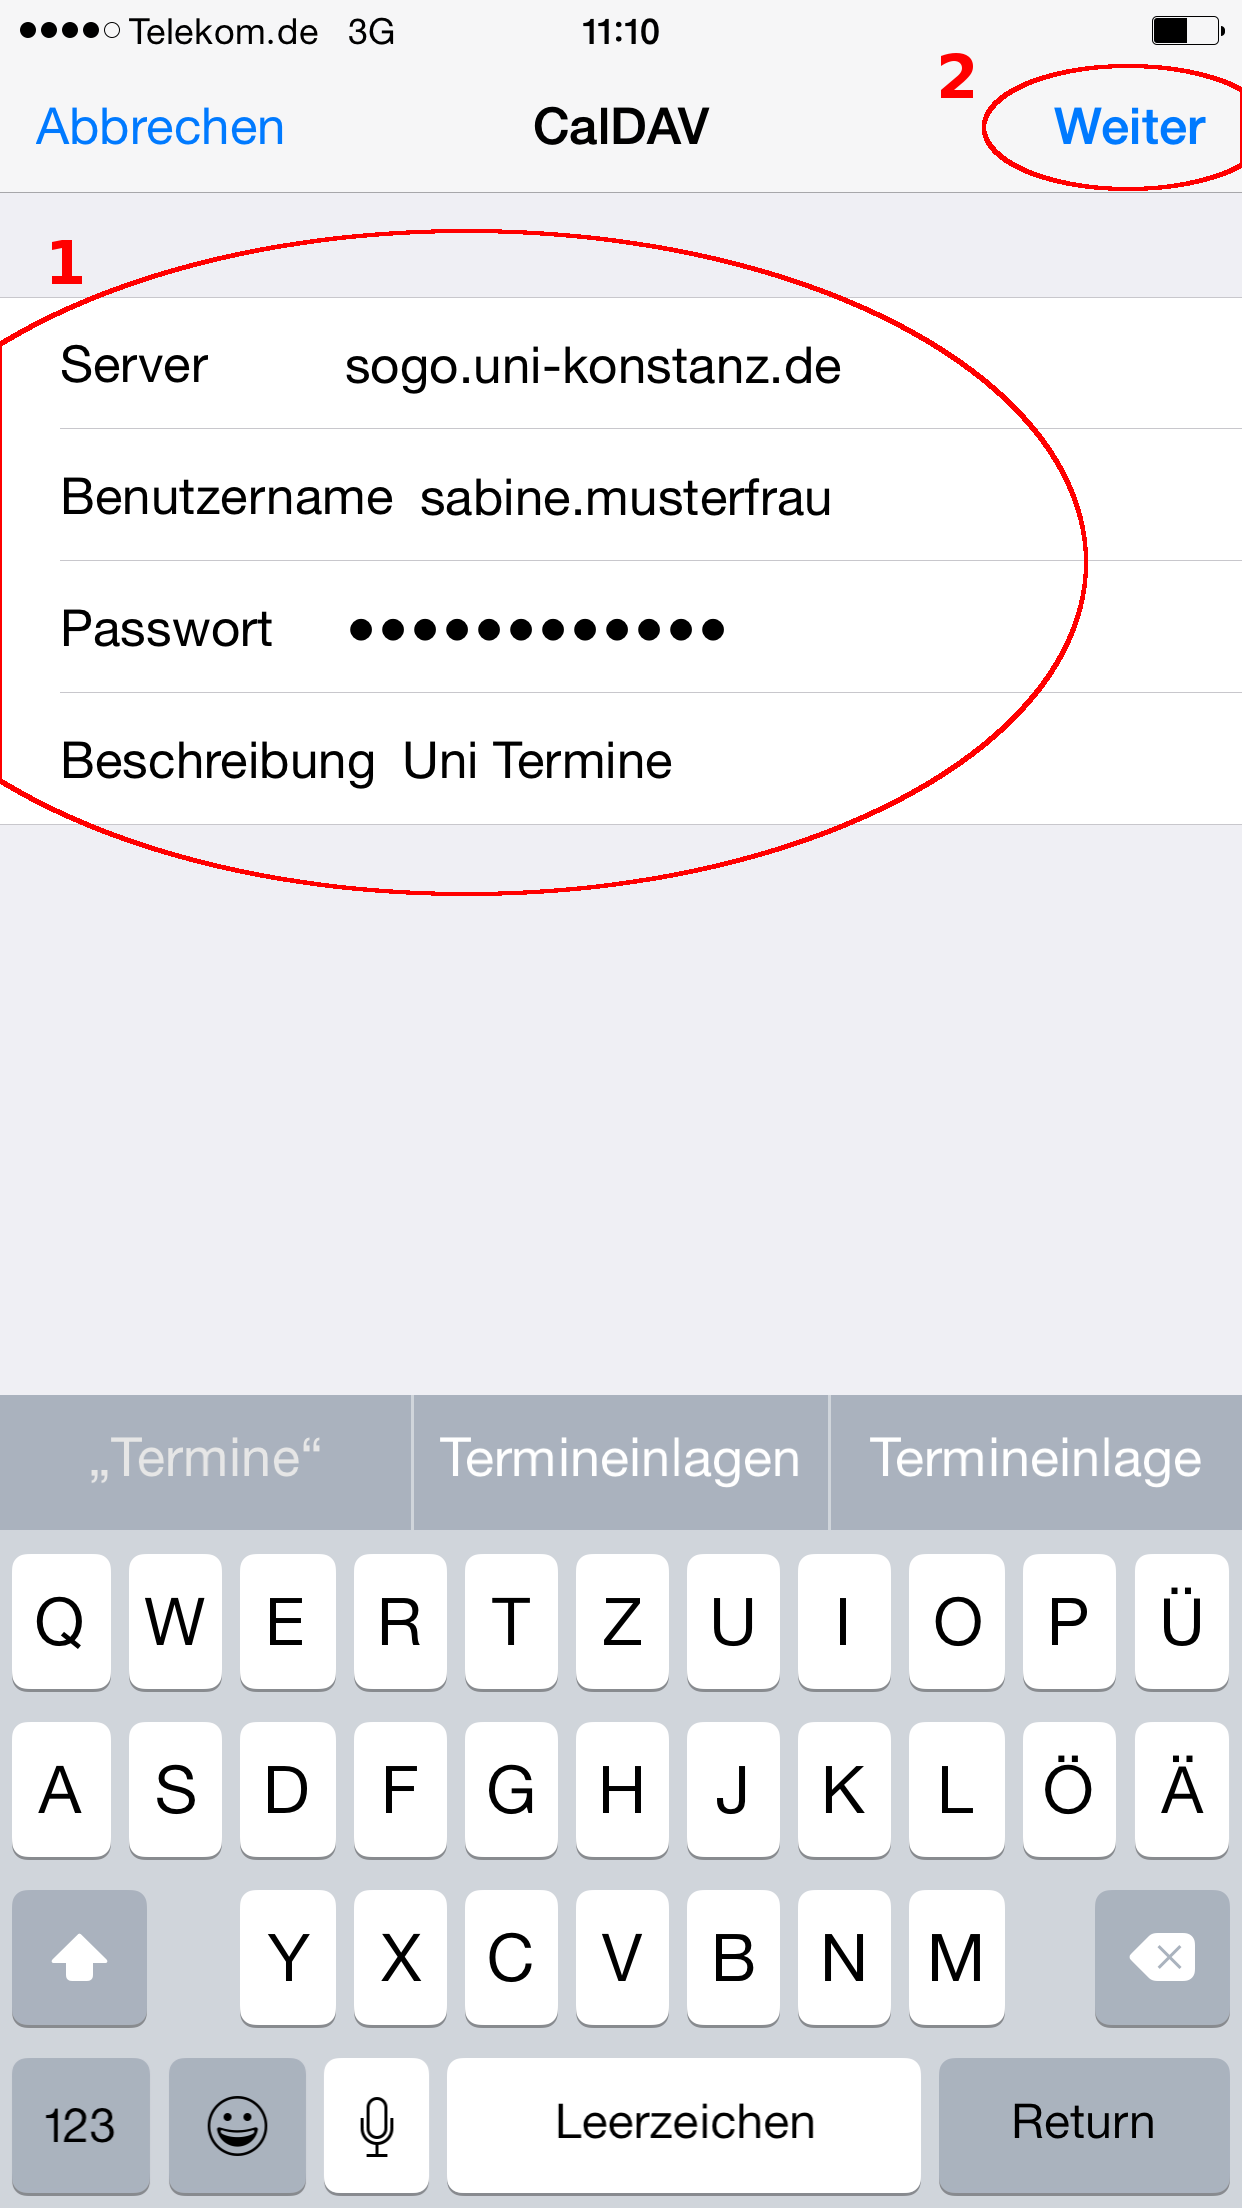
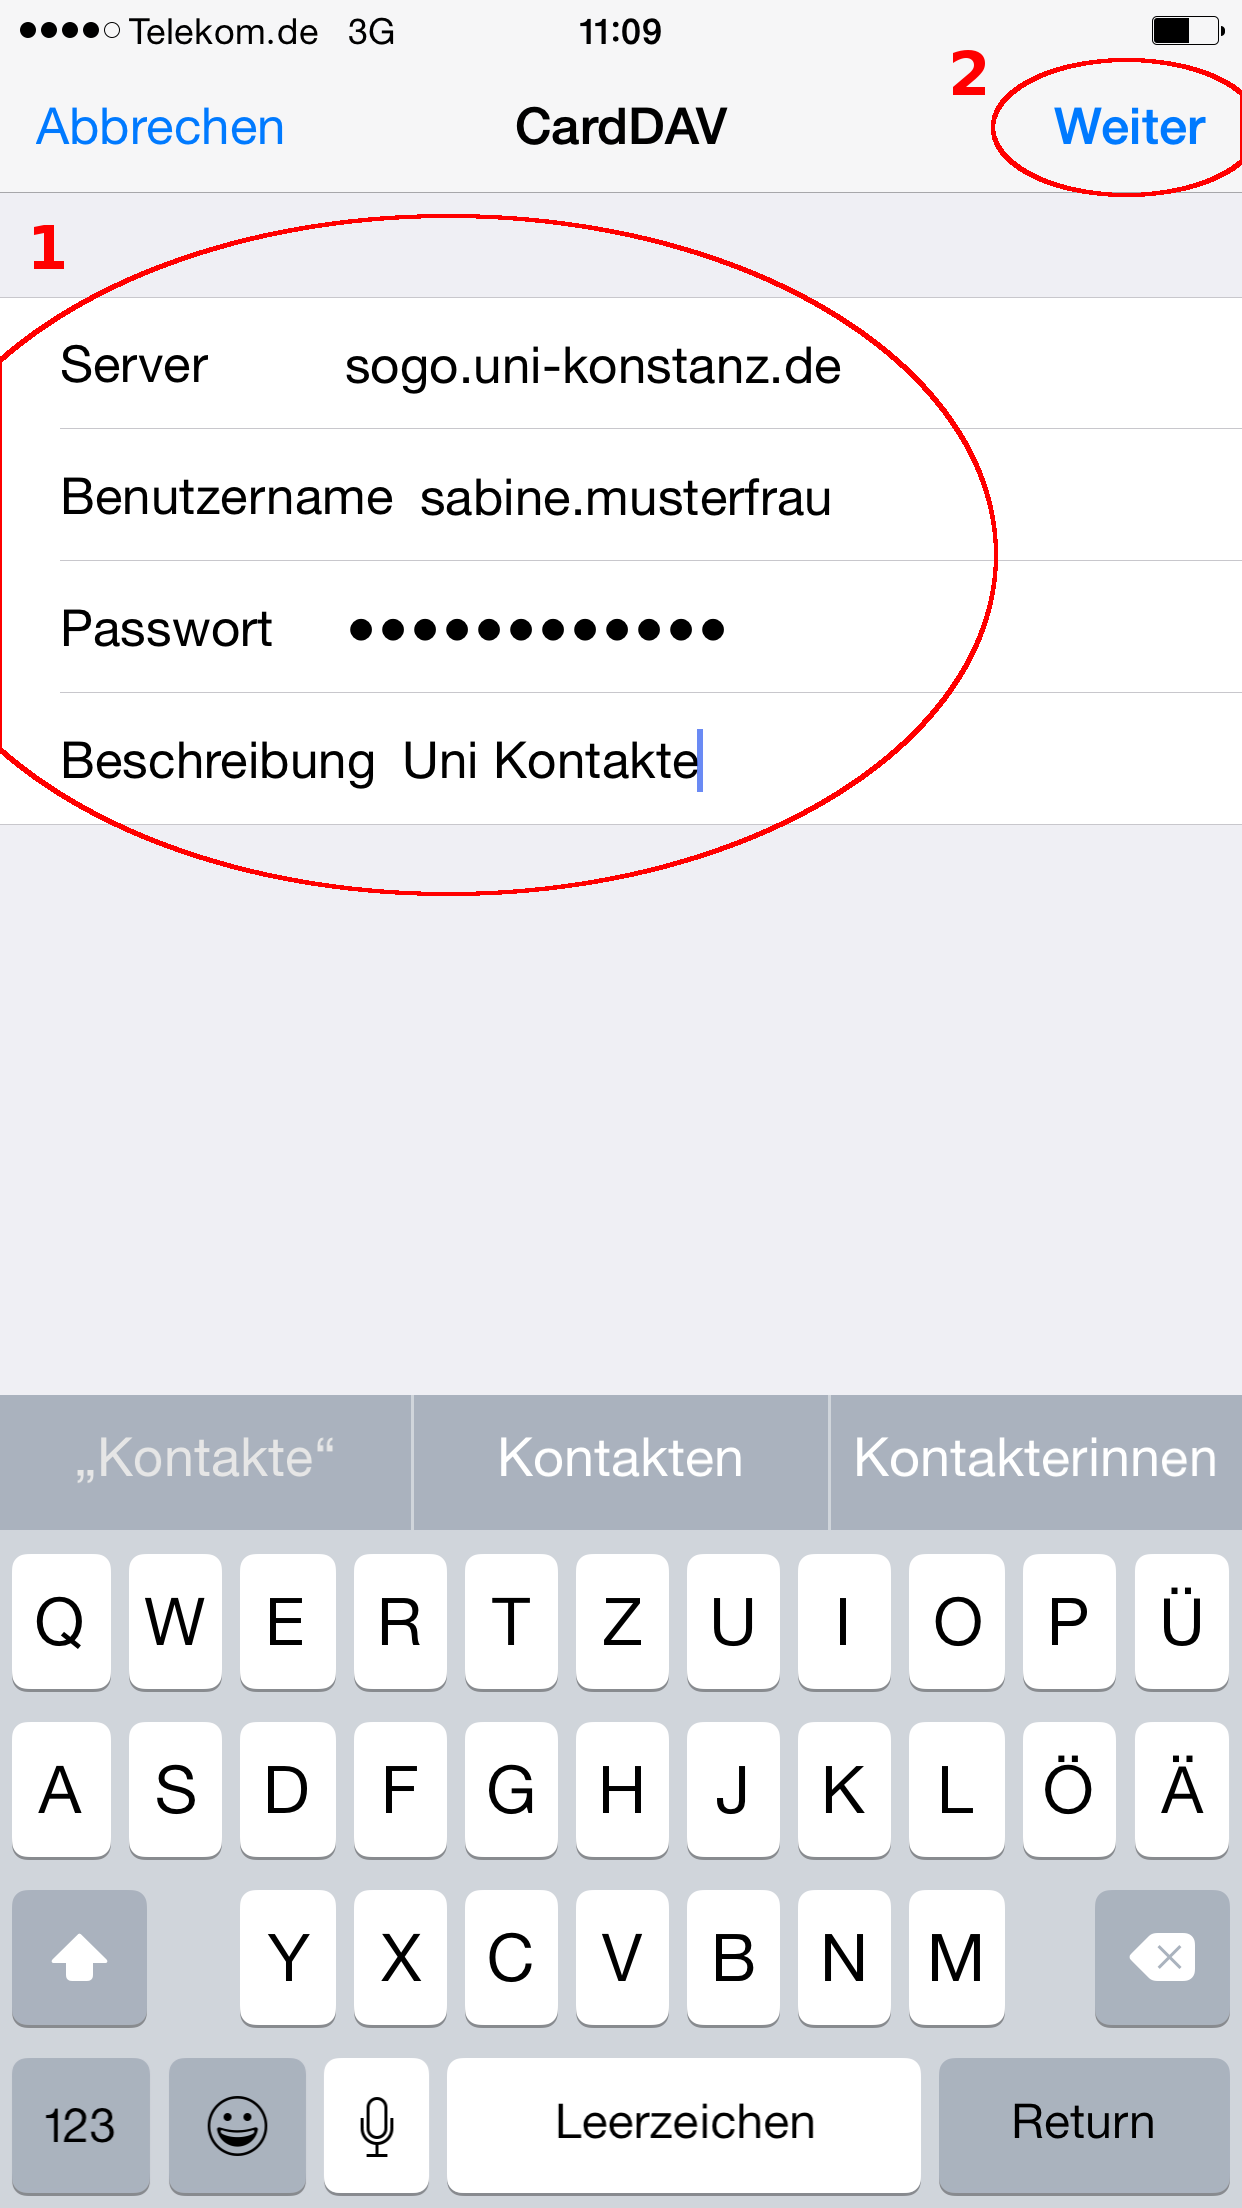
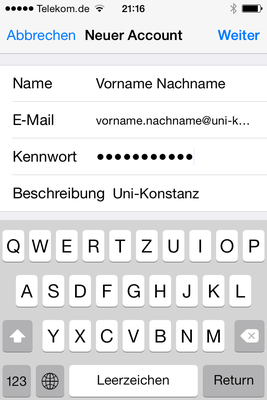
Enter your settings (1) and click on “Continue” (2).

Server:

sogo.uni-konstanz.de

User name:

Usually, this will be firstname.lastname

Password:

Your email password

Description:

Any description for this account


After selecting items for synchronisation (1), close the configuration wizard by clicking on “Save” (2).


Depending on the size of your calendar, first-time synchronisation can take up to several minutes.

Address book

Go to “Preferences” (1).


Select Email, Contacts, Calendar (1).


Select “Add account” (1).


Under “Account type”, please select “Other” (1).


Select “Add CalDAV account” (1).


Enter your settings (1) and click on “Continue” (2) to finish the configuration process.

Server:

sogo.uni-konstanz.de

User name:

Usually, this will be firstname.lastname

Password:

Your email password

Description

Any description for this account